Made to Measure in the UK
UP TO 70% OFF RRP
OVER 30 YEARS EXPERIENCE
FREE SAMPLES
New Year Discount - 10% off with code "ny2610"
New Year Discount - 10% off with code "ny2610"

Your blind can be made to fit the inside of the recess of your window or it can hang on the outside. Exact. This measurement is required when you want your blind to hang outside the recess. Your blind will be made to these measurements.(please see measuring instructions).
Recess. This measurement is required when you want your blind to fit inside the window recess. We will make the adjustment for you and your blind will be made to fit into the recess. (please see measuring instructions).
Follow these instructions if you want your blind to fit inside the recess:
1. Measure the width of the recess from wall to wall in three places as shown. Then take the shortest measurement as your width..
2. Measure the drop by measuring from the top of the recess to the window sill in three places as shown. Then take the shortest measurement as your drop..
Note: When measuring Recess please take note of any obstructions like Tiles, Dado Rails, Skirting boards etc that may alter the actual width of the recess..
Follow these instructions for blinds that you want to hang outside the window recess:.
1. Decide how much you want your blind to overlap and then provide the exact measurement of the Width you'd like your blind to be.
2. Decide how much you want your blind to overlap and then provide the exact measurement of the Drop you'd like your blind to be.
Please be aware that on roller blinds there is a mechanism at one end (which controls the blind) which means that the fabric is actually 35mm less then the blind size. On recess blinds you just need to provide the recess measurement as normal and we will make the adjustment. On Exact blinds decide how much you want the blind to overlap allowing extra for the mechanism.
Wand Controls and Lengths (If you require cord controls please contact us on 0800 6127 685)
If you order a right hand stack, your control wand will be on the right hand side of your blind when open.
If you order a left hand stack, your control wand will be on the left hand side of your blind when open.
If you order a split stack, your control wand will be in the centre of the blind and will open to the right hand side.
The length of the control wands will be as follows. If you require a different length wand, please contact us with your requirements.
Up to 1 meter blind drop - 500mm wand
Up to 2 meter blind drop - 1000mm wand
Up to 2.5 meter blind drop - 1200mm wand
Up to 3 meter blind drop - 1500mm wand
Up to 3.5 meter blind drop - 2000mm wand
1. Before you begin, ensure there is a clearance of 6mm all around the outside of your window beading to allow enough room for the Perfect Fit
2. Measure the width and the drop of your glass size accurately with a digital measuring tape. We recommend that you measure in both corners and the middle of your window and use the smallest size taken.
3. Measure the depth of the window using the depth gauge (alternatively place a piece of wood across the frame and measure the distance from the wood to the glass. This gives you the measurement from the face of the window frame to the glass (this is normally 18mm/20mm/24mm) and will determine the size of the window fixing brackets to be used.
100mm
Place a bracket at 100mm from either side of the rail

Distribute any remaining brackets equally
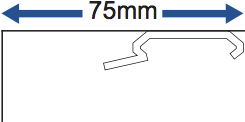
When using top fix brackets, ensure the from edge of the bracket is at least 75mm away from the surface behind rail. This allows the louvres to rotate freely without touching the wall or window behind
When ordering, you will have selected face fix or top fix backets
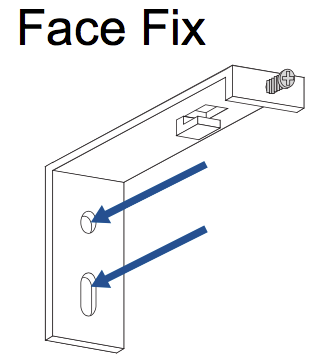
Fix the bracket to the facing surface using two screws
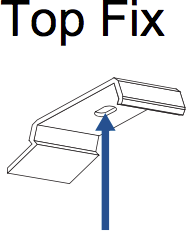
Use one screw to fix the bracket into the surface above

Make sure the controls are on the side ordered and tilt the track to locate the back section of the headrail into the bracket. Push into position and tighten the short screw to lock the track into place. Repeat this process with additional brackets.

The track must be set with the controls at the side ordered, tilt the track and locate the front lip of track into the front of the bracket push up until it clicks into position. Repeat this process with additional brackets.
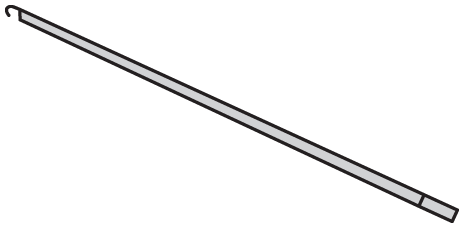
Your vertical blind is fully compliant with the latest safety standards. It has been supplied with a mono control wand that hooks onto the mechanism. This controls the opening and tilting of the blind.
Hook the louvres onto the rail.
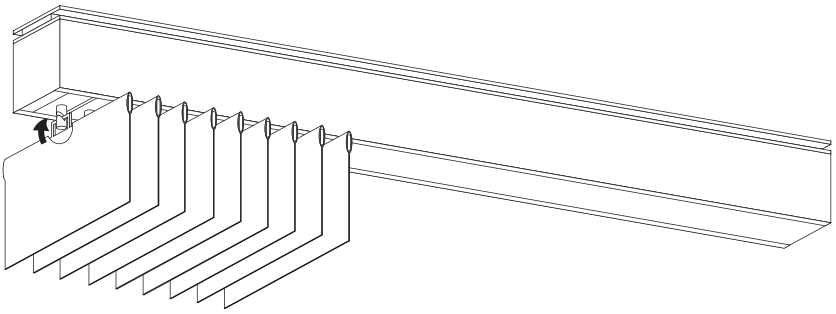
With our system all the louvres are already chained. Firstly position the hooks at 90° to the track, take the louvre roll out of its plastic protection, remove the band and unroll them with the hanger at the top and the stabilising chains at the bottom. Hand the louvres so that the seams are all facing the same way.
If you have a split bunch blind you will need to cut the chain between the middle two louvres in order for the blind to be able to draw to each side. Only do thi once the louvres have been positioned correctly. Draw the blind to separate the middle two louvres allowing you to easily cut the chain between them.
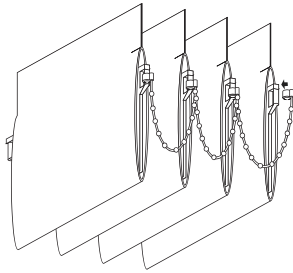

The pull control has been positioned as you requested when ordering. If you need to swap the side that the controls are on, change the roll direction or if you need to further trim the blind, simply unplug the controls from the tube. This should be done before you fix the brackets.

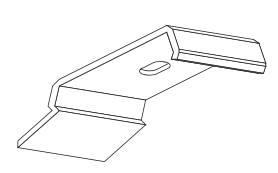
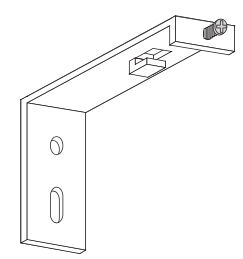
The blind has been supplied with universal fixing brackets. Decide which method of fixing you require, either face fix the blind onto a wall or window frame, or top fix the blind onto the underside of a recess or ceiling.
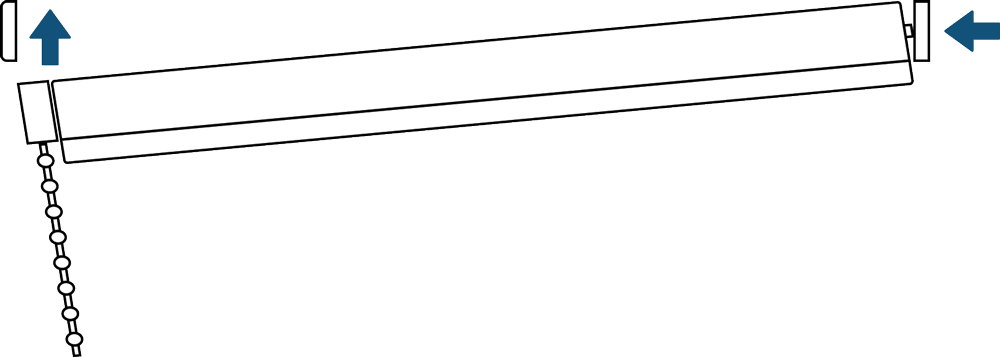
Once the brackets have been fitted, insert the blinds pin into the bracket (the pin is located at the opposite end of the blind controls). The control end will then fix into the opposite bracket.

There are two directions for roller blind fabric to immerse from their tube, these are known as ‘standard’ or ‘reverse’.
Standard sends the fabric down via the back of the tube, placing it closest to the window or wall it is mounted on. This method creates less light leakage when the blinds are mounted outside of a recess.

Reverse places the fabric at the front of the tube, therefore concealing view of the pole. This method allows extra space for window handles and other obstructions if you mount the blind inside a recess.

To alter the roll direction, the fabric must be fully unrolled so that the tube is revealed. Continue turning the tube in the same direction so that the fabric starts to roll up to the opposite side. To get the fabric to sit closer to the tube, run your hands along the fabric to loosely form a fold, and continue rolling the fabric back up.
All Roller blinds are fitted with safety breaks. If you
are fitting additional devices they must be installed at
the maximum distance possible from the control mechanism
to prevent looped cords becoming slack.
Ensure
the chain is fully taut when placed into
position.
Attach the retaining device using
suitable fixings ensuring the device is fully closed.
Universal Bracket